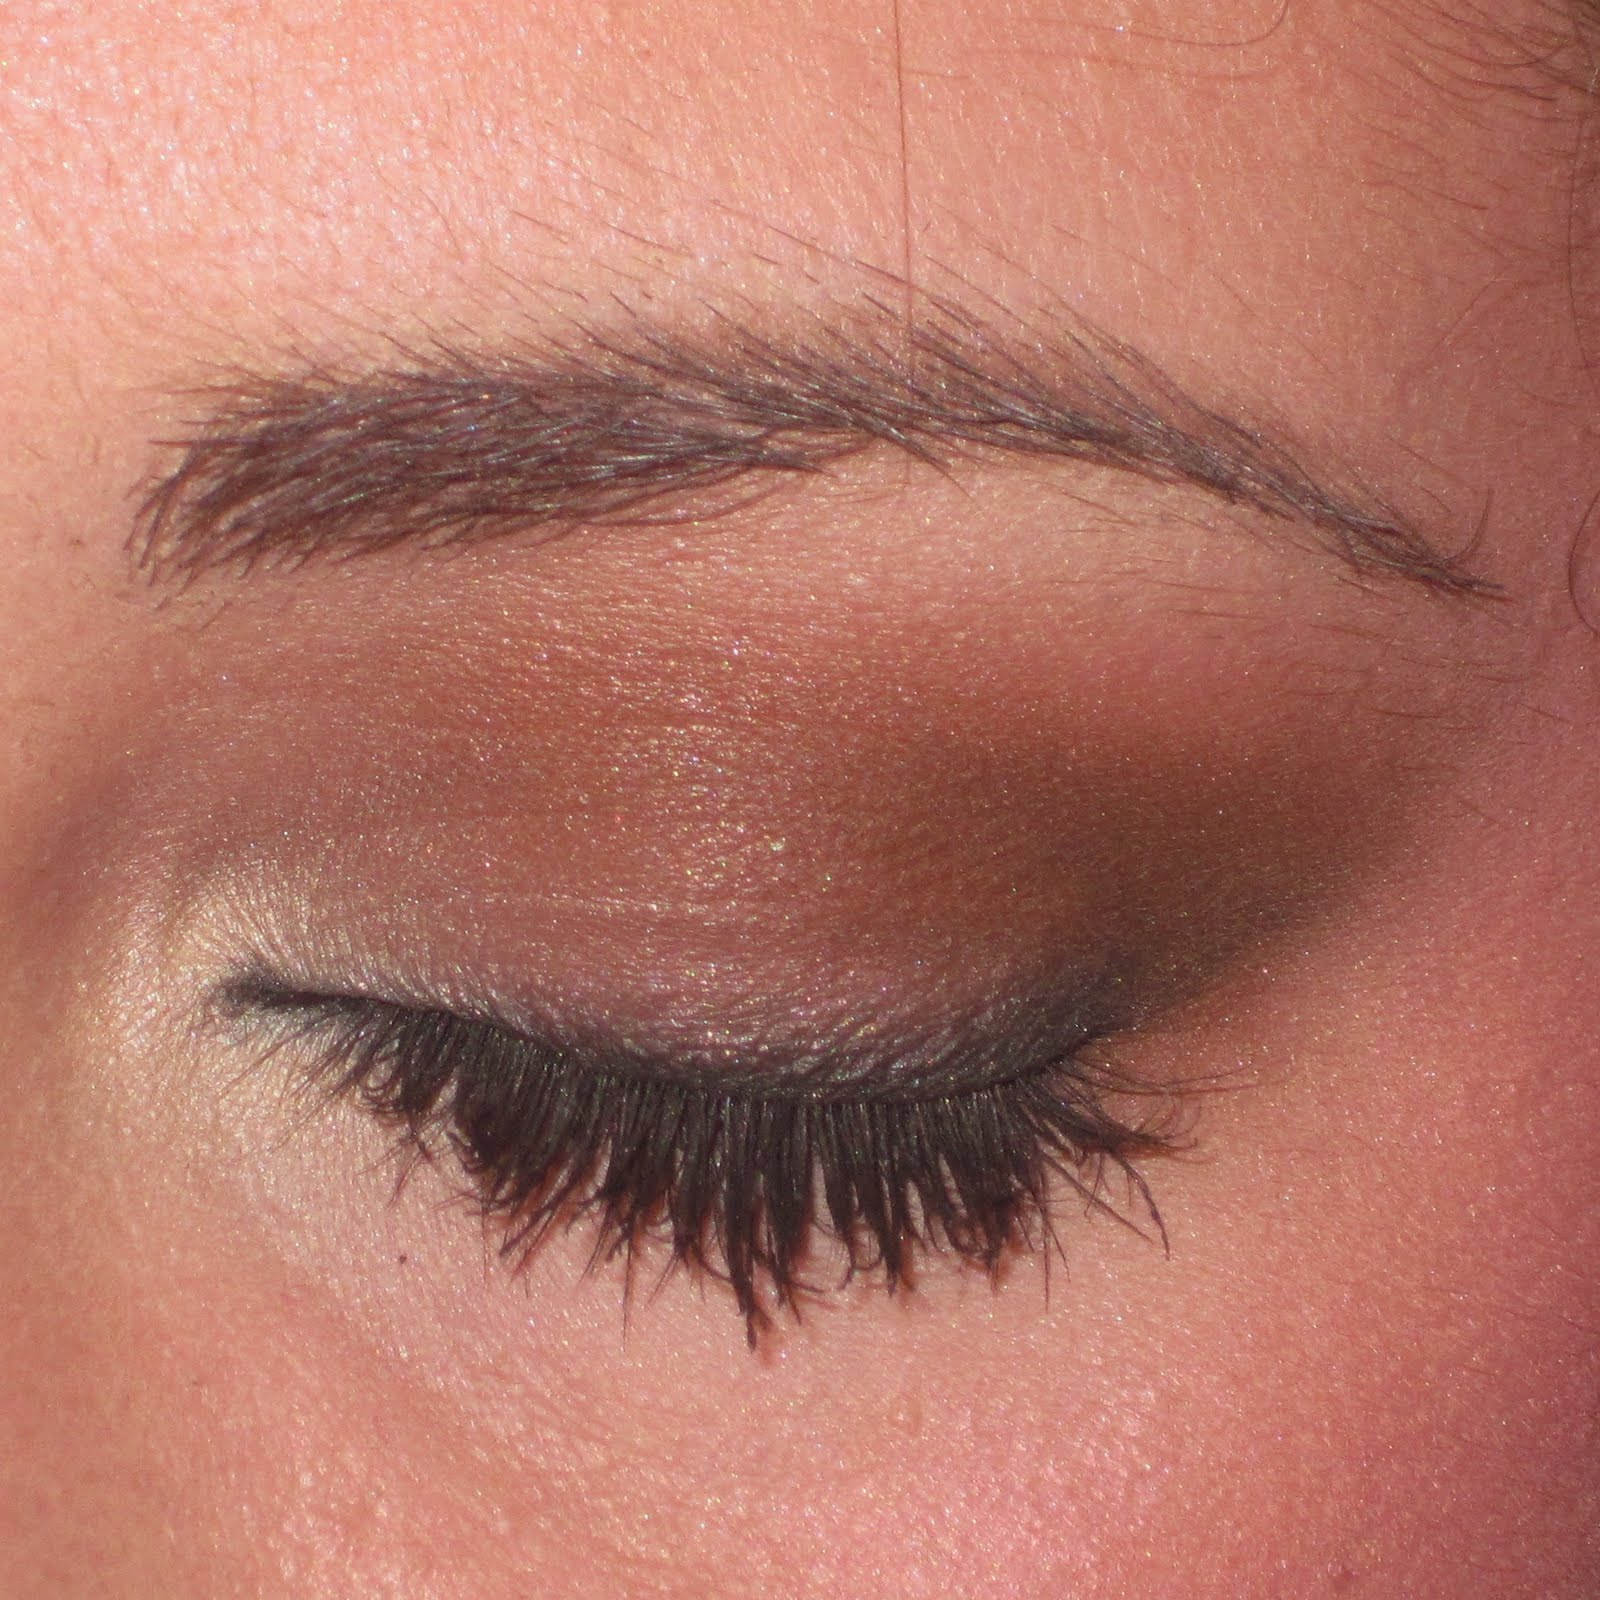
Saturday, February 26, 2011

Makeup Geek Weekly Challenge Entry


- Arab Inspired -


If you haven't heard of Makeup Geek, stop what you're doing and look her up on youtube and her website.

Anyways, she does these weekly challenges where you do your makeup to a chosen theme. This week was Arab inspired and this is what I came up with.

Eye Products:
NYX Jumbo Eyepencil in Black Bean
Carbon
MUFE #92
A shimmery pink
a nude
a shimmery white
Revlon ColorStay pencil liner


Look of the Day: 2/25/11


I love doing a glammed up neutral eye. The best way to accomplish a look like this is to have a drastic gradation across your lid and really highlight the inner corner. To amp it up even more, a thick, smudged out creamy pencil liner with a small, but thick, cat eye will do the trick! Then all you need is contour, blush, highlight, and a pinky nude lip. This look is really similar to a Kim Kardashian look, but of course, I don't look anything like her, so it translates quite differently on me.


Monday, February 21, 2011

Makeup Geek Challenge Entry

Hi all! Please help me out by watching my entry into the Makeup Geek Star Challenge and feel free to enter a video as well! Best of luck to all those who entered and good luck to the Makeup Geek squad with watching all the videos.


Thursday, February 17, 2011

Look of the Day: 2/17/11


I watched a youtube video the other day, and couldn't wait to recreate it. I only had one of the same products, and it came out very differently, but was obviously inspired by the video.

I love this look. It's sexy, sultry, smokey, but the only black is in the liner and mascara. Why should we feel so stuck to black and brown for day time eyeshadow in cold weather? I don't! Bump up the color! Make your eyes pop and get the attention that you deserve!

My Product List:
  • Soft Ocher Paint Pot by MAC
  • NYX Jumbo Eye Pencil in Rock Mountain Green
  • light blue and teal/green duo chrome shadow
  • MUFE #92
  • Plumage
  • light cream shadow
  • Revlon Color Stay in Black
  • Carbon

Inspired by:


Monday, February 14, 2011

Look of the Day: 2/10/11


This is an updated pinup eye. The base of this look is a very classic, simple look with matte shadow. I swept a shadow several shades lighter than my skin tone across my entire lid from lash line to brow bone, then darkened the crease with a grayish brown color. Here's why this look is "updated". First, I used a light gold shimmer to highlight the center of my lid and a deeper red gold in the outer crease area. I also skipped the usual black winged out liner and smudged a maroon liner into my lash line with a similar colored shadow.

I kept my face very soft with little to no contouring and peachy cheeks. Of course I filled in my brows, which show up more gray on camera than they really are, and for once I didn't color my lips.


Monday, February 7, 2011

Versus.

NYX Longwear black eyeliner VERSUS Revlon Colorstay black eyeliner

I would love to be able to afford some high end, long wear, smudge proof liner such as Urban Decay 24-hour, but I can't. So here's the next best thing, Revlon Colorstay. Today I wanted to test the difference between a regular pencil liner, and one that claims to be long lasting.

Note: I did not set my liner.


1:00pm


1:15pm


6:00pm


top: NYX, bottom: Revlon

Left to right:
1. Both liners drawn on my hand.
2. After a few light rubs.
3. After several vigorous rubs.

Final thoughts:
I'm impressed. For $7.49 this liner did the job. It is creamy and pigmented. It did melt below my waterline throughout the day. However, if I had set the liner, I'm sure it would have lasted much longer. I was also very impressed with my "rub test". The Revlon eyeliner stayed put through quite a bit of scrubbing!

Friday, February 4, 2011

Look of the Day: 2/1/11


There really isn't much to this look, except a easy little eyeliner trick I have been loving lately. You can do this with almost any look. Take a creamy dark eyeliner. Line your upper and lower lash line, water line. Don't worry about being precise because now your going to take a stiff pencil brush with a matte black shadow and smudge the hell out of your liner. I bet you thinking, "what if I smudge too much?" Welllll, then you can take the same shadow that's on your lid to blend the liner into the shadow. It gives you a much softer, somewhat mysterious look. This technique would also look really nice all by itself.


My Before and After


before after


Well folks, I guess I love you just that much, because I am willing to show you all what exactly is underneath all my makeup. Now, you should also know that I am not one of those girls who is unwilling to go out in public bare faced, I do, all the time; it's just not something I typically photograph. Personally, I think my three biggest flaws are how uneven my brows are (right now), the bags under my eyes (which are wayyyy worse in the morning, and this before picture was taken at night), and how my eyelids are uneven. HOWEVER, and this is a big however, makeup has the ability to fool the eye into believing that these things are not really there!

Tricks of the trade:

Brows: I always fill in my eyebrows no matter how uneven they are at the time. The shape and fullness of your brows can completely change your entire face. You can use a pencil, shadow, or both! Lately I've been using both. Also, you always want to use colors that are a few shade lighter, or you can get funky and use a hot pink or purple! I highly suggest looking up videos on youtube.

Under Eye Bags: Make sure you moisturize before doing anything. Then, use a lighter concealer or foundation making a right triangle with your tear duct being the 90 degree point. Then, lighten up between your eyes and down the center of your nose. This will cover up the bags, brighten your face, and give you a little lift all at once.

Uneven Lids: Although the intention is for your makeup to be even, most faces are not, and therefore, your makeup will not be either. (It will look virtually even, however.) On the lid that droops more, make a slightly thicker line and when drawing a cat eye, make the angle slightly more severe. This will lift the eye, while the thicker liner will appear to be the same as the opposing one.


For this look, I used a large fluffy brush to wash the entire eye from lash line to brow with a shadow several shade lighter than my skin tone. I then defined my crease with a cool, matte brown, and finished off with a shimmery white gold to highlight the tear duct and below the brow. For the liner, I used a dark brown gel liner to make a pin-up like cat eye.

My face consisted of very light contouring and a peachy cheek. I kept the lips nude and matte, and of course filled in my brows, which were probably too light this day.

I hope you enjoyed!